Tutorial: run your first session
This walks through one short auditory session from a cold start: setting up, drawing the arms, choosing sounds, recording, and finding the data afterwards. It takes about twenty minutes, and you can do all of it with no animal in the maze.
Do this once without an animal
Run the whole tutorial on an empty maze first, or with a dark object you move by hand. You will find your camera and audio settings without wasting an animal's session.
Before you start
You need the software installed, a camera pointed at the maze, infrared illumination on, and a speaker connected. The Arduino is not needed.
Open the application:
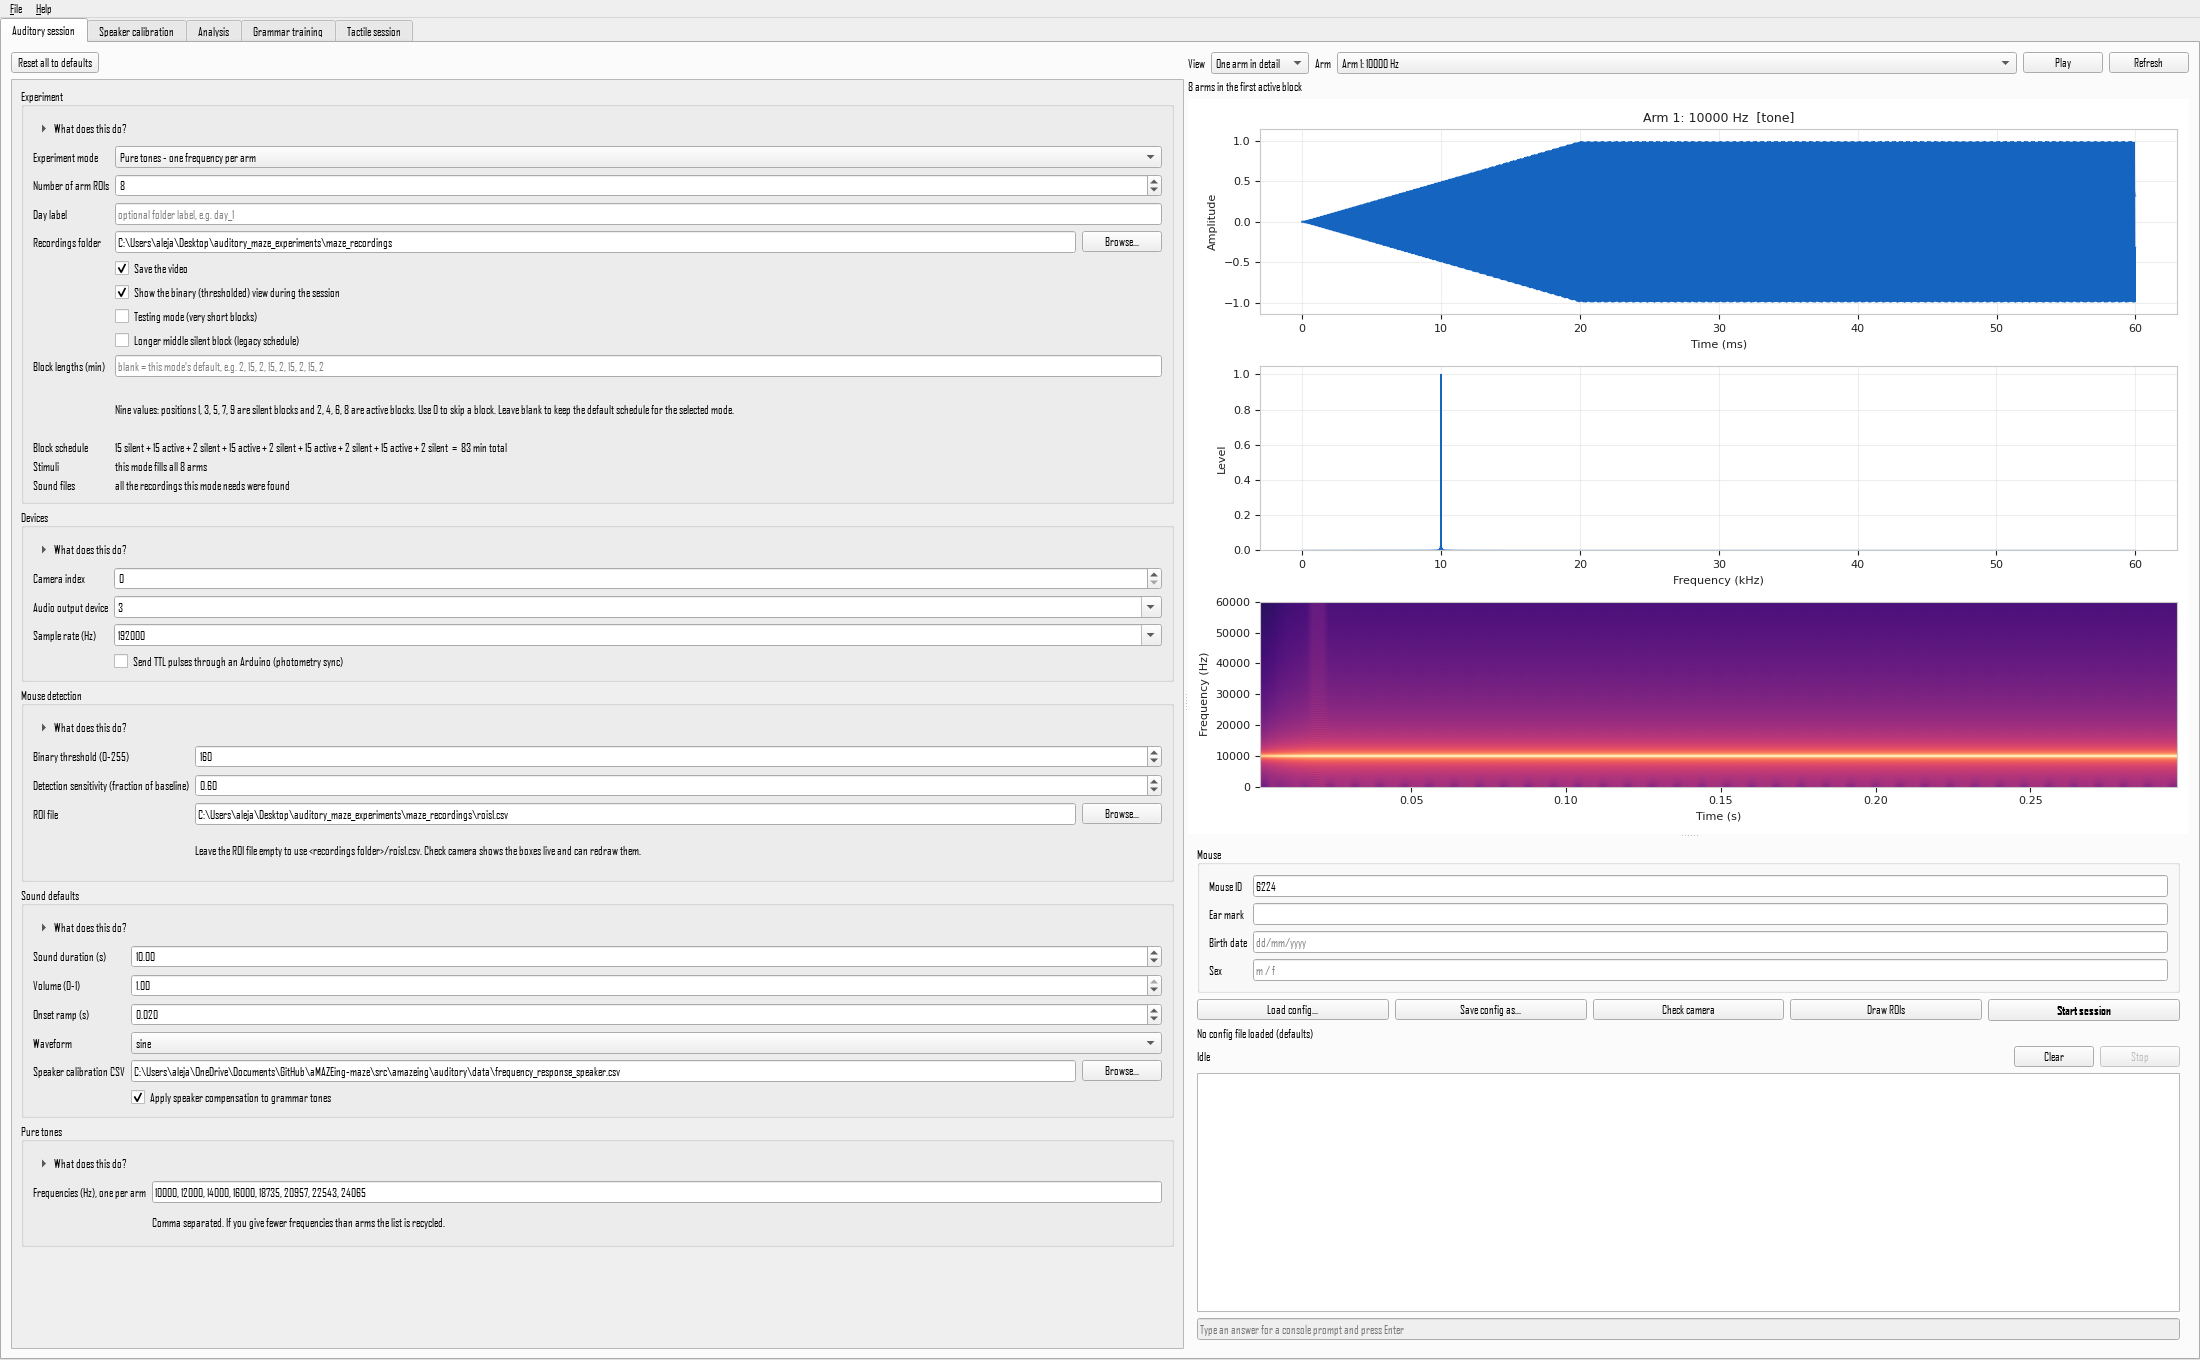
You land on the Auditory session tab. The form on the left is the whole session; the panel on the right shows the sounds and, once you start, the session's output.
Step 1: point it at your hardware
Open the Devices section and set three things.
Camera index identifies which camera to use. 0 is the first one the computer found. If your machine has a built-in webcam as well as the maze camera, the maze camera is usually 1. You will confirm this in the next step when you see the picture.
Audio output device must be your ultrasonic interface, not the Windows default. The list shows the index the sound library reports, which is what matters.
Sample rate should be 192000 for ultrasonic work. The rate has to be at least twice the highest frequency you want to play, so 192 kHz covers stimuli up to 96 kHz.
Leave Send TTL pulses through an Arduino unticked. It is only for photometry synchronisation, and the port settings stay hidden while it is off.
Nothing in the audio list looks right
Run python -c "import sounddevice; print(sounddevice.query_devices())" in a terminal. The numbers on the left are the indices. If your interface is missing entirely, it is a driver problem rather than a problem with this software.
Step 2: tell it how many arms, and where they are
In the Experiment section set Number of arm ROIs to the number of arms your maze has. Eight is the usual configuration.
Set Recordings folder to where the data should go. Everything the session writes lands under here.
Now press Check camera. A window opens showing the live camera. This is the moment to confirm the camera index is right: if you see the wrong room, close the window and change it.
The first time, there are no arm boxes yet, so you are asked to draw them straight away. Afterwards, press D in the live view whenever you want to draw them again.
You will be asked to draw rectangles in a fixed order, and the names are printed as you go:
entrance1andentrance2, the two zones of the corridor connecting the home cage to the maze. The order matters: passing entrance1 then entrance2 means the animal entered the maze, and the reverse means it left.- Then one rectangle per arm,
1through8.
Drag a box, press Space or Enter to confirm, and repeat. Draw each arm's box over the part of the arm the animal's body will occupy, not the whole arm. A box that includes the junction will trigger on animals merely passing by.
The layout is saved next to your recordings as rois1.csv and reused for every later session, so you only redraw when the maze or camera moves.
Step 3: check the detection
Stay in the live view from step 2. Two numbers matter, and both are sliders at the top of that window.
Binary threshold is the pixel value that separates floor from animal, after the picture is turned black and white. The default of 160 suits a brightly lit infrared floor. Watch the binary window as you move it: the floor should be solid white and anything on it solid black.
Detection sensitivity is where the line sits that counts an arm as occupied. Every arm has a bar in the readout on the right, and an arm is occupied once its bar falls to the left of the line.
Now the part worth doing properly. Walk a hand down each arm in turn. The box should turn red promptly and blue again when you take it away. Then look at the bars with the maze empty:
- Green means the arm sits comfortably clear of the line.
- Amber means it sits close to it. That arm will trip on a shadow. Lower the sensitivity until it goes green, or fix the lighting.
- Red with nothing in the arm means the baseline is wrong. Press C to measure it again, with the maze empty this time.
Press S to keep the values you settled on, then Q to close. Both come back into the form.
An empty arm reads above 1.00, not at it
The baseline is a sum over the grey picture and the reading is a sum over the black and white one, so they are on different scales and a healthy empty arm often sits near 1.6. Do not try to make it read 1.00. What matters is the gap between empty and occupied, and putting the line in the middle of it.
Keep the maze empty at the start
The session measures each arm's empty brightness in its first few seconds. If anything is in the maze then, every later comparison is against the wrong baseline.
Step 4: choose what to play
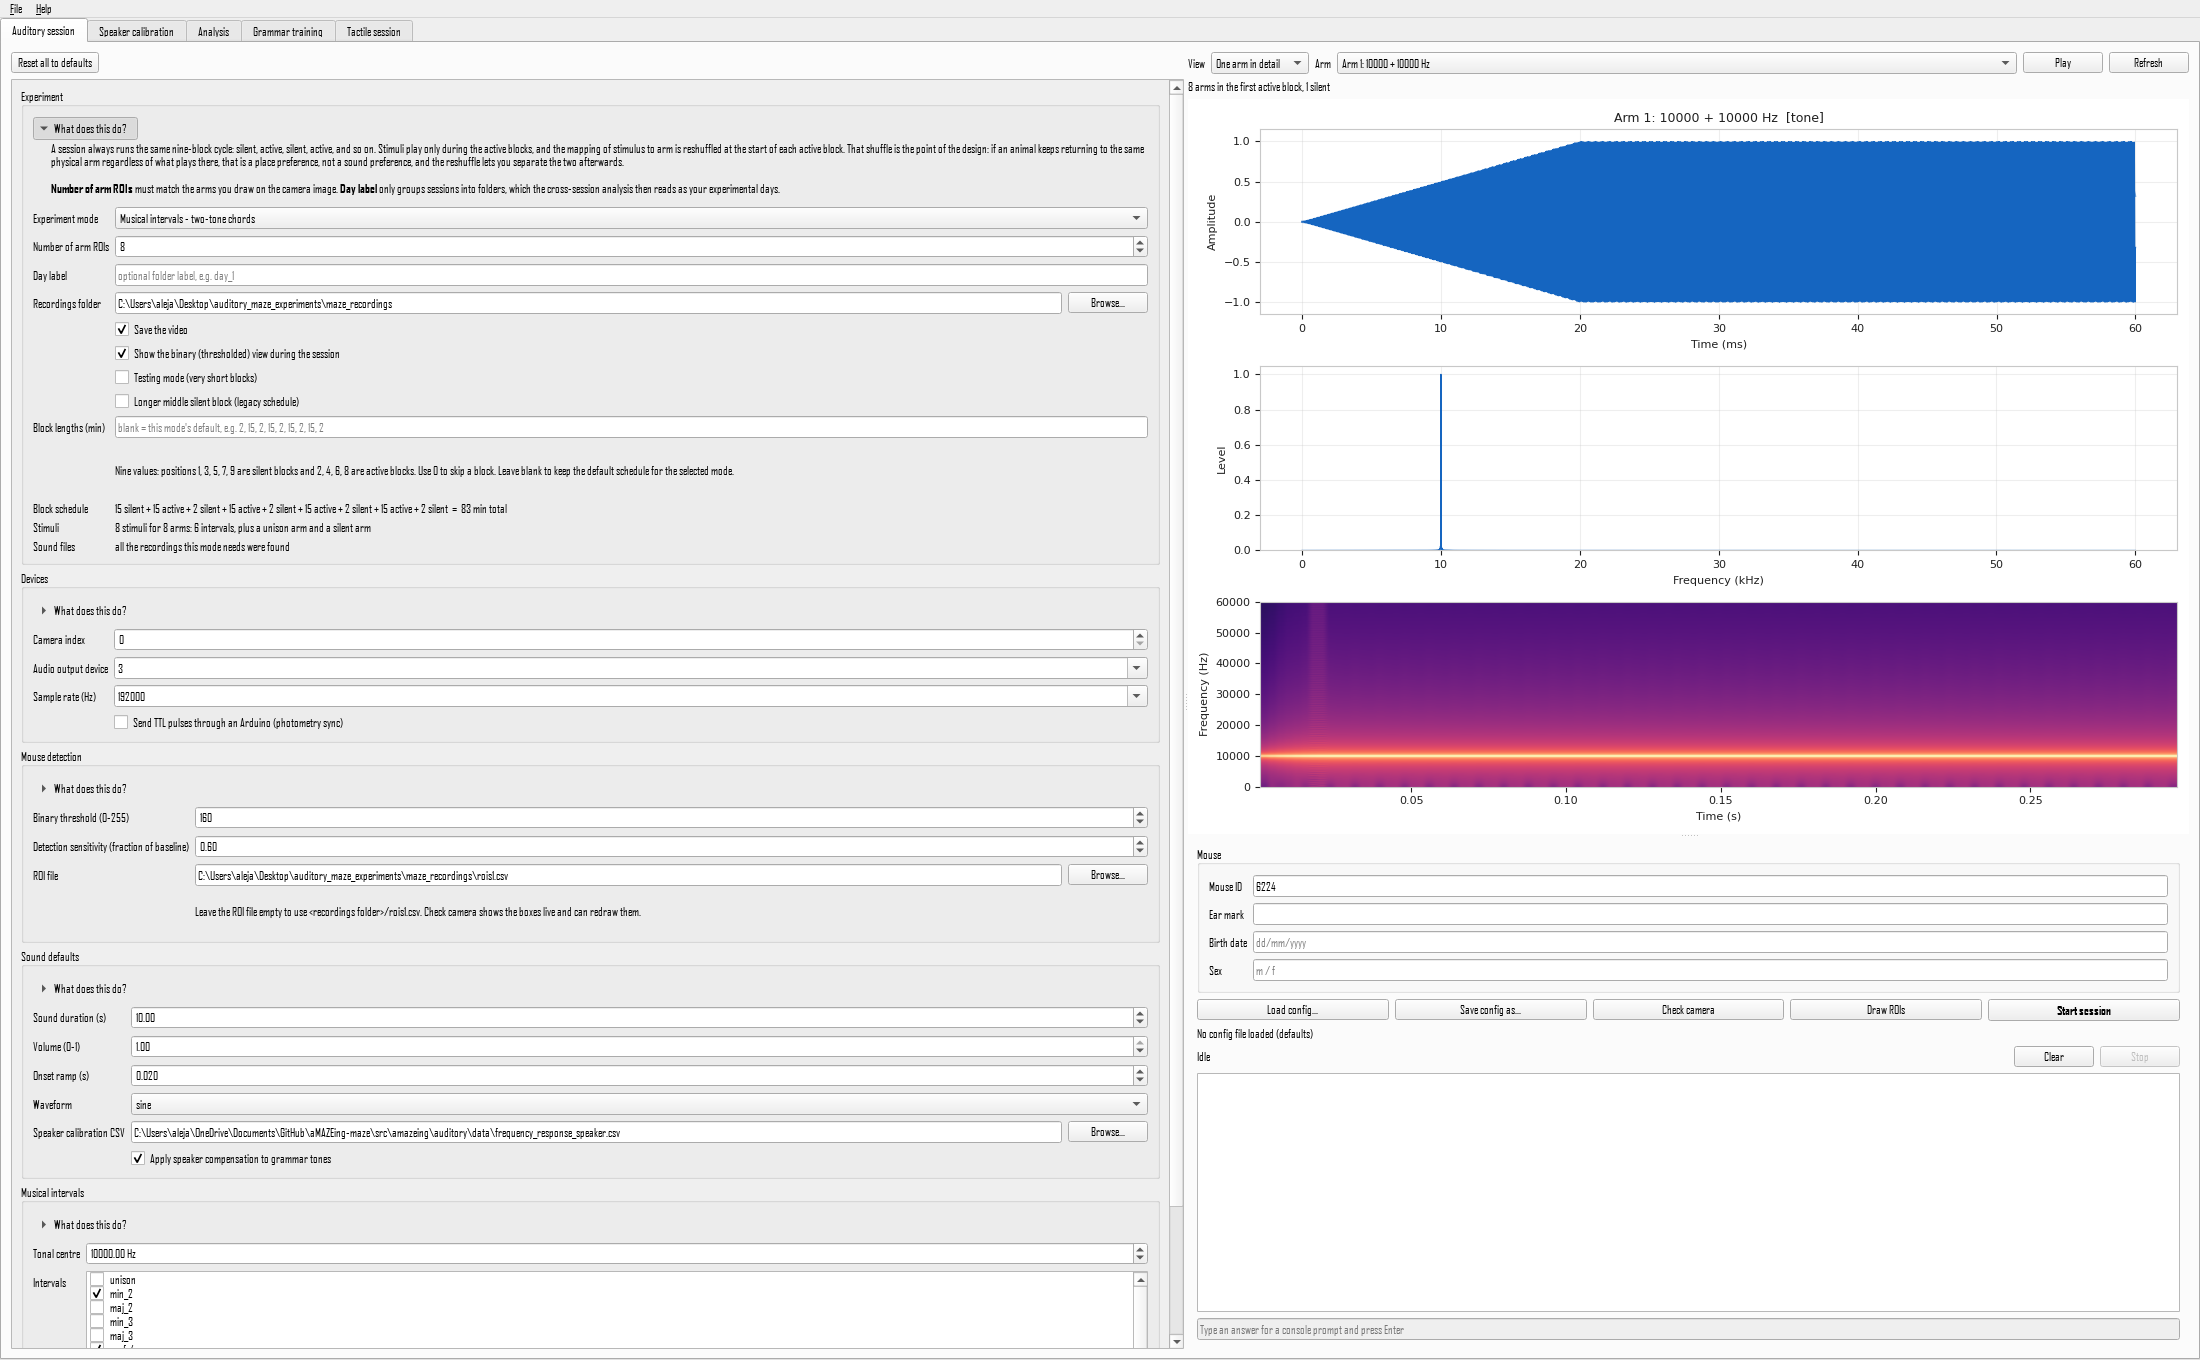
Open the Experiment mode dropdown. For a first session pick Pure tones, the simplest option: one frequency per arm.
The Pure tones panel appears with a list of frequencies. The defaults give eight tones from 10 to 24 kHz. Give one frequency per arm; if you give fewer, the list is recycled and some arms play the same tone.
Every section has a What does this do? toggle. Open the one on Experiment now, because it explains the nine-block structure you are about to record.
Step 5: look at the sounds before playing them
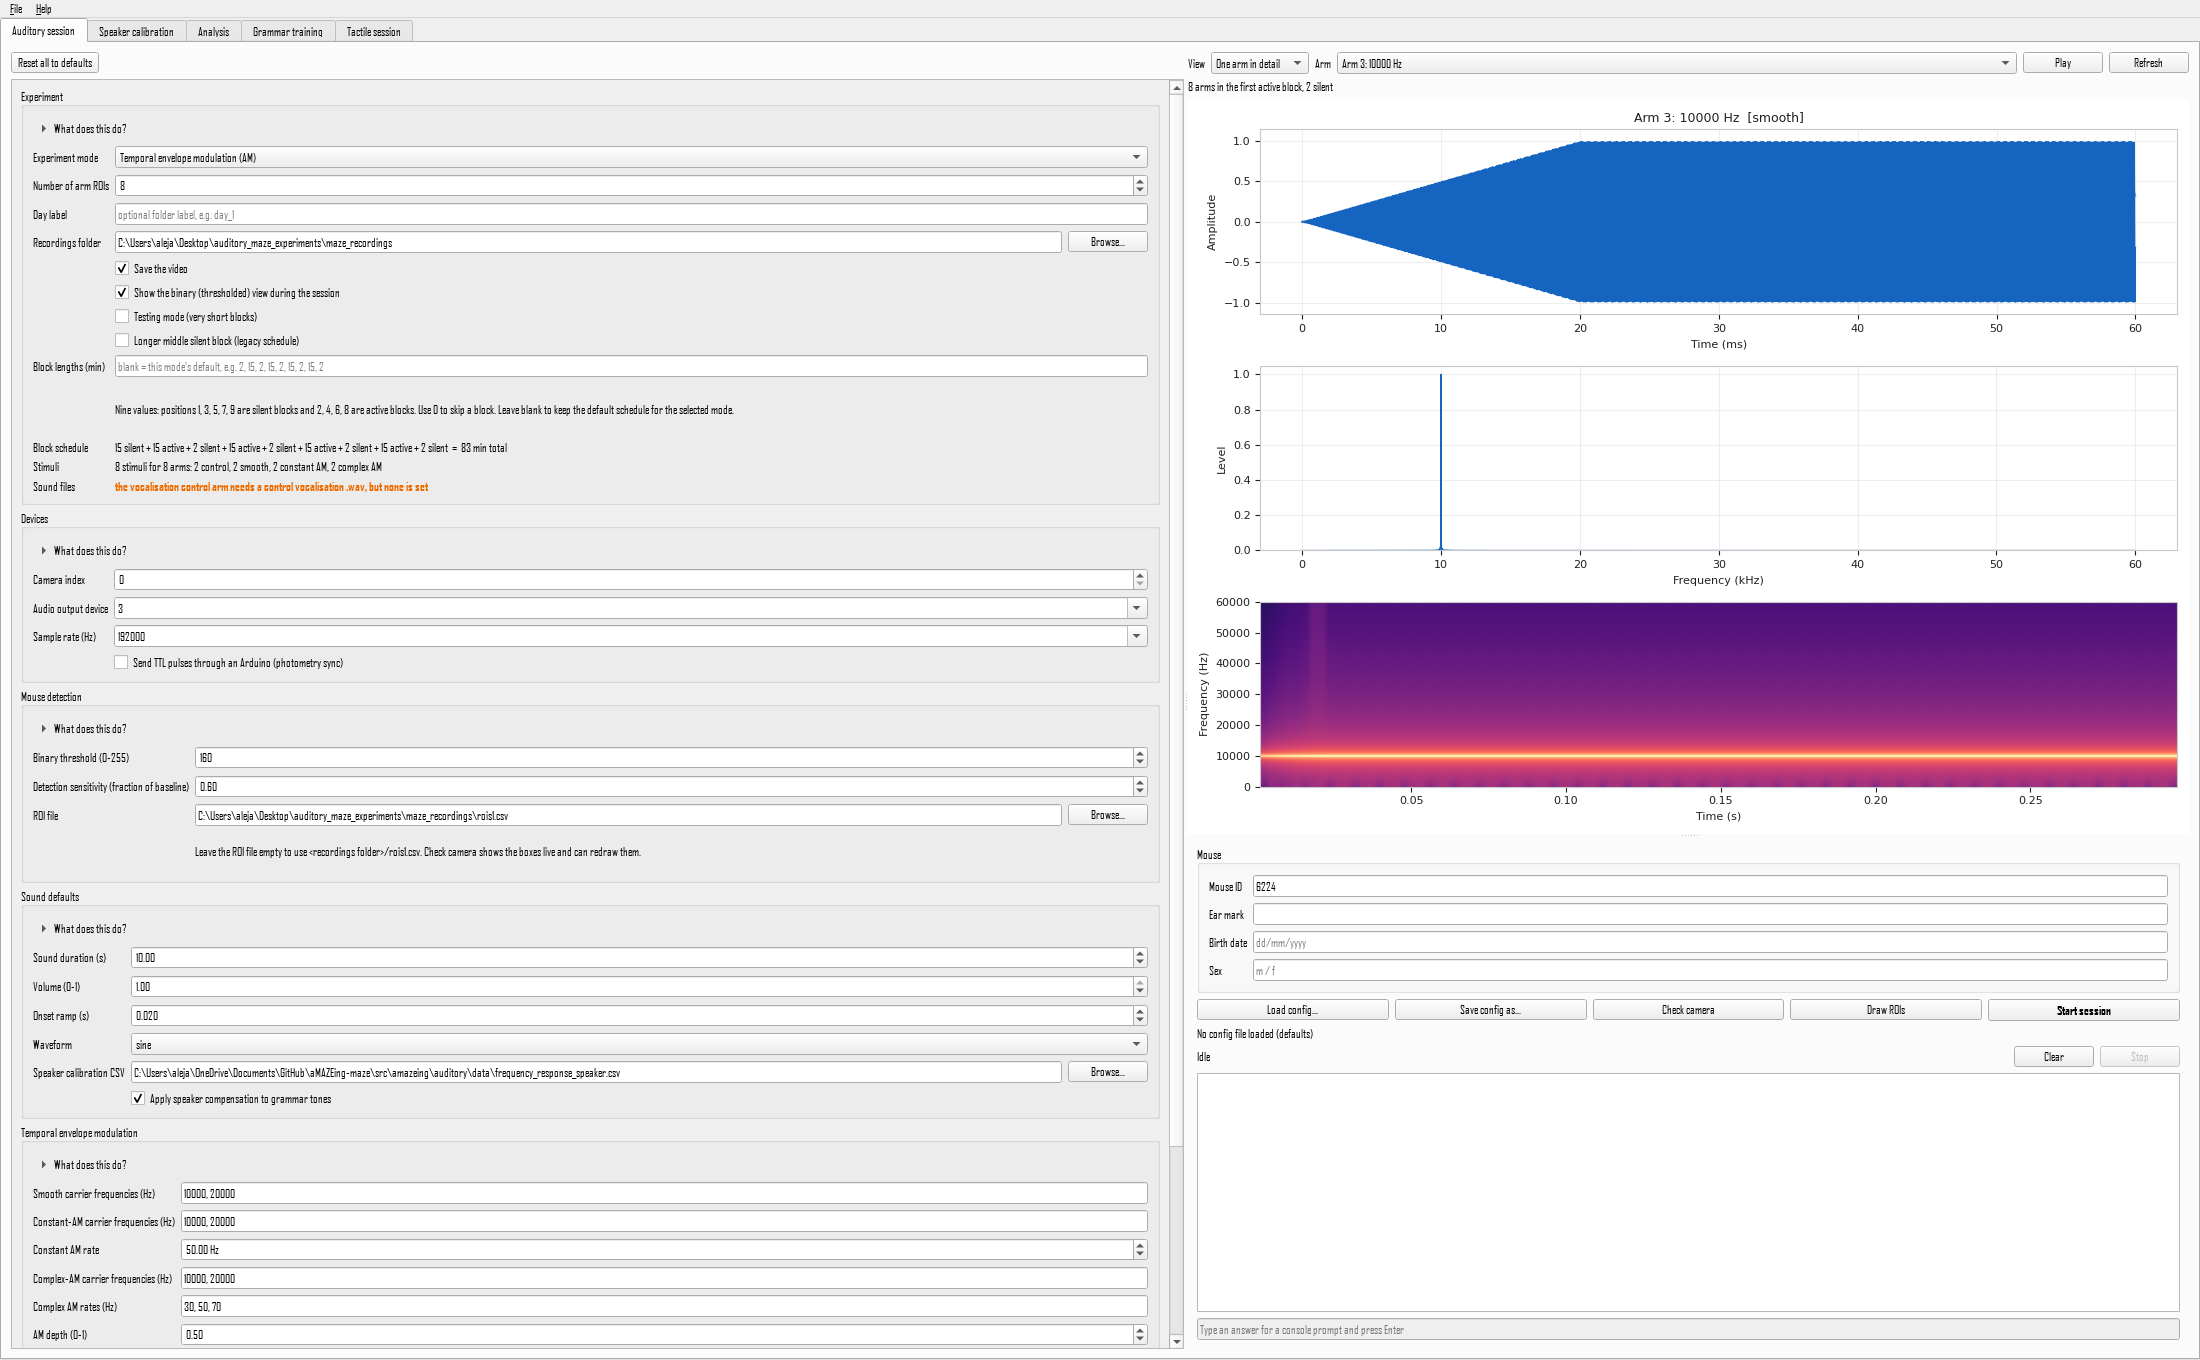
The right-hand panel shows what will actually play, generated by the same code that runs the session.
With One arm in detail you get the waveform, its amplitude envelope, the spectrum, and a spectrogram. Check that the spectrum peaks where you expect: a 10 kHz tone should show one line at 10 kHz.
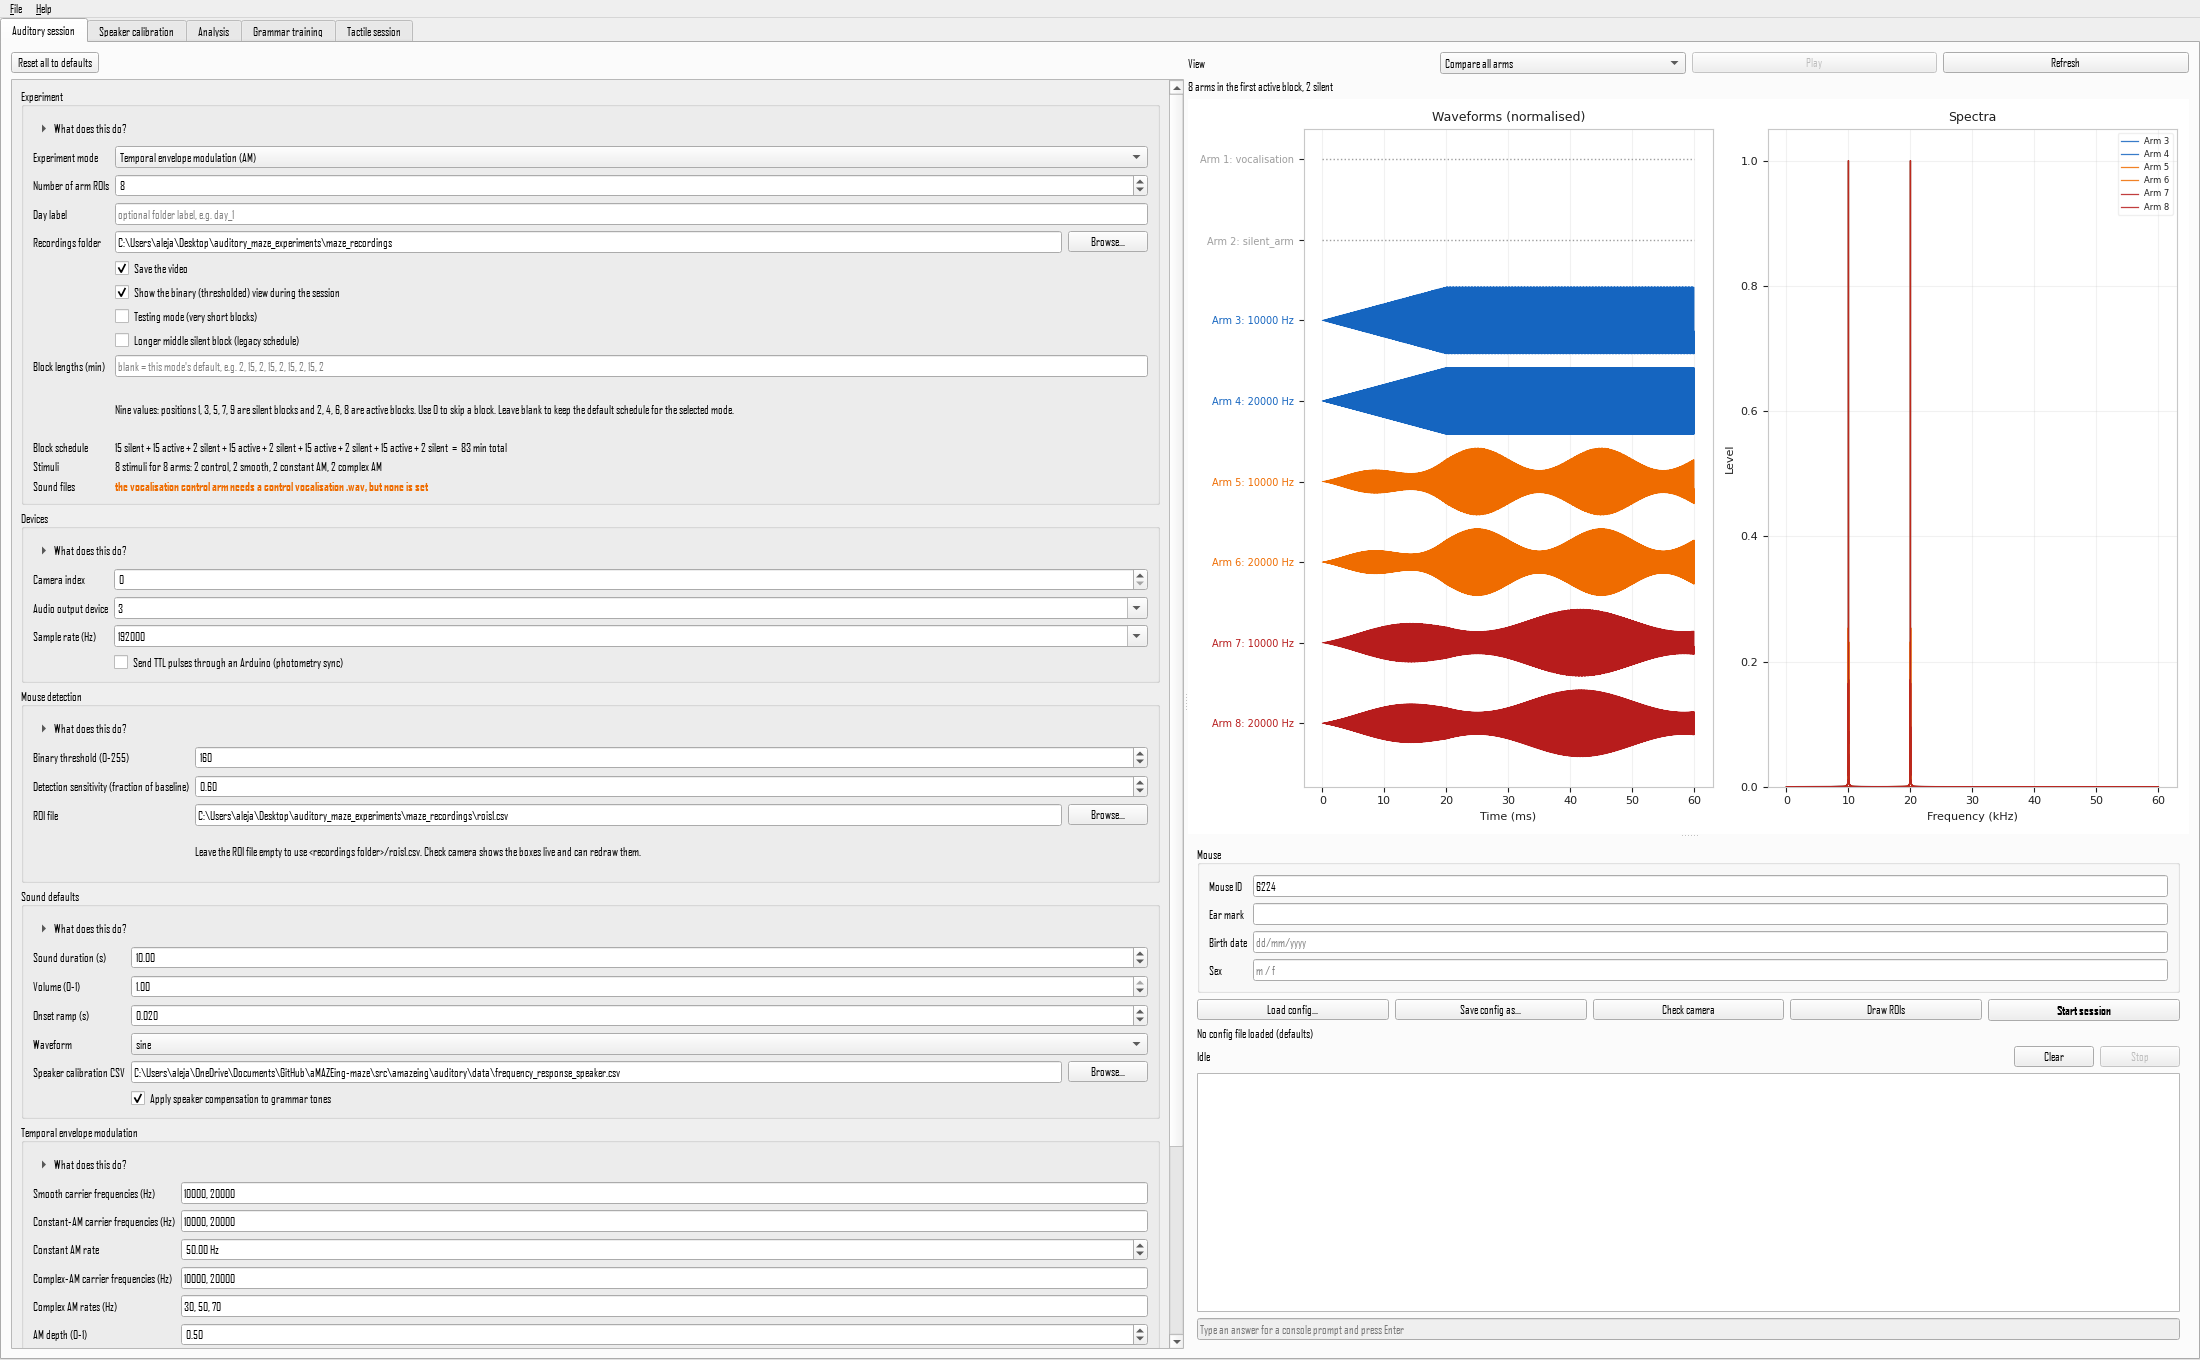
Switch to Compare all arms to see the whole set at once, which is the fastest way to notice that two arms are accidentally identical.
Press Play to hear the selected arm. For ultrasonic stimuli you will hear nothing, which is expected; use it to confirm the device works by temporarily setting an arm to something audible like 8000 Hz.
Step 6: make it short, then record
A real session is over an hour. For a test, tick Testing mode (very short blocks) in the Experiment section. The Block schedule line immediately below shows what you will get, in words.
Enter anything in Mouse ID, for example test. It only names the folder.
Press Start session. The console panel fills with progress, and two windows open:
- Experiment View, the camera with your arm boxes drawn on it. A box turns red when its arm is occupied.
- Binary Debug View, the black and white picture the detection actually uses.
Move a dark object into an arm. The box should turn red and the console should log the entry. If it does not, or if boxes turn red with nothing there, stop the session and adjust detection sensitivity: raise it to detect more readily, lower it to be stricter.
Press Q or Esc in the camera window to stop early.
Step 7: find your data
When the session ends it generates figures automatically. The folder is:
Inside:
| File | What it holds |
|---|---|
trials_<timestamp>.csv |
One row per block and arm: which stimulus was there, total time, visit count |
<mouse>_..._detailed_visits.csv |
One row per visit: arm, stimulus, entry and exit times, duration |
<mouse>_..._maze_entries.csv |
When the animal entered and left the maze |
session_manifest.json |
The full configuration used, the files written, and the units of every column |
fig1_arm_totals.png and others |
Figures generated at the end |
<mouse>_<timestamp>.mp4 |
The video, unless you turned recording off |
The session manifest is worth knowing about. It records exactly what was configured, so a session folder explains itself years later without anyone having to remember.
Step 8: save the recipe
Press Save config as... and keep the YAML file. Running the same protocol again is then either loading that file in the application, or:
The application already writes a copy of this file for every session into <recordings folder>/session_configs/, so even sessions you did not deliberately save can be reproduced.
What next
- Experiment modes for the other paradigms and their parameters.
- Speaker calibration, which you should do before collecting real data, because an uncalibrated speaker makes some frequencies louder than others and a loudness difference looks exactly like a preference.
- Analyse a set of sessions once you have recordings.